Posted on

Top 10 Stone Choices of 2019

stone choices 2019

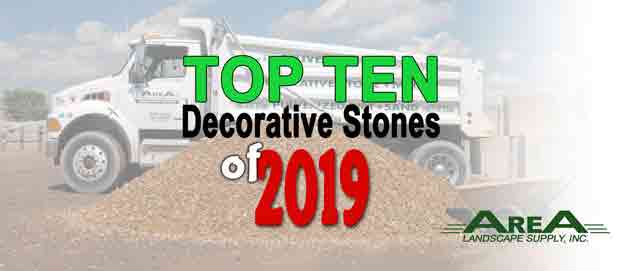
Top 10 Decorative Stones of 2019

stone choices 2019

Decorative Stone Choices of 2019

Here is our countdown of the most popular decorative stone choices of 2019!


Here at AreA Landscape Supply, we have a variety of over 20 different decorative stones.  CLICK HERE to view our Decorative Stone selection.  More can also be found HERE on our gravel web page. This top ten list can help narrow down your options for your landscaping project.  And now, our countdown of our TOP 10 best-selling decorative stone choices of 2019!  Happy “ROCK” -tober!

10.

Large Flint Stone

Large Flint Stone consists of deep, bold, saturated hues of rusty reds, burgundy, browns, medium and dark greys.  The stones are mostly smooth with some irregular-shaped jagged pieces.  This color-popping stone would be a great accent to a low-maintenance, predominantly green landscape.

9.

Decomposed Granite

DecGranite_a

Decomposed Granite contains a wide range of stone sizes from about 1/8″ or 1/4″ on the smallest side to about maximum 1″ on the largest side.  The stone shapes are mostly rough.  Within this decorative stone, shades of mostly orange and brown are accented with some dark, almost black, stones as well.

8.

Slate Chips

As the name eludes to, this stone has the appearance of a gray slate chips. The thin layered fragments of this stone could also be described as shale-like. The deep gray color glistens in the sunlight. The characteristics of this stone provide a strong contrast and a unique, but sophisticated, appearance.

7.

Pea Gravel

PeaGravel_a

Considering all of the AreA Landscape Supply decorative stones, Pea Gravel is very small in comparison.  From 3/8″ to 1/4″ in size and very smooth and rounded edges, Pea Gravel is great for gardens, playgrounds, paths, water features, drainage, etc. The color range includes white, cream, tan, caramel, light & medium grey.

6.

Small River Rock

Small River Rock follows the same characteristics as Large River Rock(see # 1).  The size is the only difference, at about 3/4″ in diameter.  The smooth texture and variety of colors carry through both sizes: dark granite-greys, pale beachy whites, golds, taupes, and even salmon-like pinks.

5.

Large Bark Nuggets

Large Bark Nuggets have the look of weathered wood chips and coloring that is mostly brown tones with some grays. The stones are fairly lightweight and generally about the size of a golf ball, however, dime-sized pieces are a common occurrence. This stone is similar to Autumn Smoke (see below).

4.

Autumn Smoke

Autumn Smoke is darker than Large Bark Nuggets, consisting mostly of charcoal grays with some brown tones. The texture is porous and lightweight. Neutral house color schemes could benefit from the deep neutral tones found within Autumn Smoke.

3.

Meramec

Meramec is a stone family that comes in a medium and a large size, large being the most popular at just bigger than a golf ball. The colors are bold shades of gold, caramel and tan. These stones have a textured surface and inconsistent shape which leads to a more rustic landscape.

2.

American Heritage

A mixture of bold and pale colors that include creamy white stones, beige stones, gray granite & pink granite. The surfaces of the stones are mostly smooth, with some tumbled stones as well. The size of American Heritage can roughly be compared to the size of an egg.

1.

Large River Rock

Large River Rock is about 1-1/2″ in diameter and generally smooth in texture.  There is a wide variety of colors found within the mix.  You will find dark granite-greys, pale beachy whites, golds, taupes, and even salmon-like pinks.  This type of rock is the style used to skip rocks across water, but it doubles as a great landscaping accent

Posted on

Special Financing for 6 or 12 Months*

Special Financing

Special Financing for 6 or 12 Months*

Special Financing

Special Financing is available at AreA Landscape Supply.  Looking to pay over time?  Make it possible today with 6 or 12 month special financing.  Both plans are subject to credit approval.  Easy application with quick credit decisions.  Ask a member of our sales staff to answer your specific questions and help you with the tools to get started.  Minimum purchase for the 6 month special financing program is $500.  Minimum purchase for the 12 month special financing program is $1500.

FinancingSp2014c

Special Financing for 12 Months 1
with a minimum purchase of $1,500
1Subject to credit approval. Ask for details

[dt_fancy_separator separator_color=”custom” line_thickness=”10″ custom_separator_color=”#81d742″]
FinancingSp2014b

Special Financing for 6 Months 2
with a minimum purchase of $500
2Subject to credit approval. Ask for details

Posted on

U-cara Wall System

wall system

U-cara wall

wall system

To achieve this look, try:

Unilock Umbriano French Grey with Town Hall Basalt accent and the U-Cara wall system.

Unique Design Detail:

The U-Cara wall system is used  to it’s fullest extent mixing fascia colors and finishes to create a smooth, contemporary, and curated patio with a linear custom fire pit.

Find more information on U-cara wall here: U-Cara Cabinet System – AREA Landscape Supply

Posted on

New Product! Medium Flint Stone

Exciting New Products at AreA Landscape Supply

New Product! Medium Flint Stone

Exciting New Products at AreA Landscape Supply

We are announcing a new addition to our decorative stone selections.  Not only do we have Large Flint Stone (2.5″ x 1.5″), but now we carry a smaller version.  Medium Flint Stone is 3/4″ x 1.5″ in size with the same color variations as the larger counterpart.


View the full stone selection on our Decorative Stone page.

Flint stone is a mix of bold, saturated hues containing rusty reds, burgundy, browns, medium and dark greys.  The stones are mostly smooth with some irregular-shaped jagged pieces.

Coverage based on a 2″ depth, for both sizes, is about 70 SQ FT per ton.

FlintStoneM-1
[dt_fancy_separator separator_color=”custom” line_thickness=”10″ custom_separator_color=”#81d742″]
Flint Stone Medium – vs – Flint Stone Large
[dt_before_after image_1=”5921″ image_2=”5920″]
Posted on

Staff Favorites: Decorative Stone

staff favorites

Staff Favorites - Decorative Stones

staff favorites

We asked around the AreA Landscape Supply staff: What is your favorite Decorative Stone Choice?  If you haven’t already, what would you like to install in your own yard?  Share your favorites!

These are some of the answers.  Perhaps our list will help with your decorative stone selections.

Royal Gorge

Royal Gorge is a medium-sized stone mix that runs about 1 1/2″ Rock Size.  Colors are a great blend of mostly rust, a variety of orange shades & tints, along with a white-pink quartz, and a few brown quartz-like stones.  This may be just the right contrast to light beige siding, or homes with brown architectural accents (such as trim, shutters, doors & corbels).

Slate Chips

This stone has the appearance of a gray slate chips, hence the name. The thin layered fragments of this stone could also be described as shale-like. The deep gray color glistens in the sunlight. The characteristics of this stone provide a strong contrast and a unique, but sophisticated, appearance and is great for a more modern, or transitional design.

Bark Nuggets

Bark Nuggets have the look of weathered wood chips and coloring that is mostly brown tones with some grays. The stones are fairly lightweight and generally about the size of a golf ball, however, dime-sized pieces are a common occurrence.

Posted on

Staff Favorites: Unilock pavers & walls

staff favorite unilock

Staff Favorite Unilock Products

We asked around the AreA Landscape Supply staff: What is your favorite Unilock product.  If you haven’t already, what would you like to install in your own yard?

These are some of the answers for staff favorite Unilock products.  Perhaps our list will help with your brick pavers or retaining wall block selections.  Follow the links below to see all of the Unilock pavers and wall block options.

Unilock Paving Materials

Unilock Wall Block

Rivenstone

A Unilock Stonemark paver, Rivenstone, combines the durability of concrete with the character and flexibility of natural stone. It’s an ideal choice for those looking to add enduring quality and timeless appeal to walkways, courtyards, pool surrounds, terraces and patios.

Rivercrest Wall

With Rivercrest™ Wall, you get the character and flexibility of natural stone combined with the durability and affordability of concrete.  Cast from natural stone, this block benefits from Reala Technology and received the “red dot” award in 2013.  Consider the Rivercrest Firepit Kit to coordinate with and complete the look.

Beacon Hill

Inspired by natural cut flagstone, the blended colors and distinctive texture of Beacon Hill Flagstone has a relaxed look and feel, with all the benefits of Enduracolor™ technology. The subtle surface texture is comfortable to walk on in bare feet, but appears more dramatic in the light of sunrise and sunset.  Also available is Beacon Hill Smooth, which offers a smooth surface texture for a sleek, modern look. Beacon Hill Smooth also offers a more contemporary color palette, including monochromatic color choices.

Quarry Wall

Whether your outdoor design plans call for constructing a curved wall, seat wall, edging or a more complex outdoor kitchen, the antiqued finish of Olde Quarry will give it an air of sophistication. Its weathered appearance makes it the perfect alternative to expensive natural stone products.

Umbriano

A zero bevel edge and granite-like surface appearance make Umbriano a popular choice for sleek, modern projects.  Its unique mottled surface is achieved with ColorFusion™ Technology which randomly disperses rich color and granite particles to achieve a natural, non-slip texture.

Lineo Wall

Contemporary and sleek lines define Lineo Dimensional Stone with a linear multi-length plank look. Ideal for garden walls, pillars, other outdoor vertical elements, Lineo Dimensional Stone offers up modern design and exceptional flexibility.

Posted on

Retaining Wall Installation

Retaining Wall Installation

Retaining wall installation has to start from the bottom.  Base preparation is the most vital part of the wall installation process. Begin laying out the trench with a string line. Dig a trench 6″ to 12″ deep and about 4″ wider than the width of the style of blocks you intend to use. If your property slopes, step the trench up or down, allowing for at least half the height of a block to be buried. This saves time and material. Compact the trench and fill it with 3″ to 6″ of gravel (see “Base Thickness Chart” below). Rake out, level, and compact the gravel.

Laying the First Row

Some retaining wall products must be split. Use a 3-lb. mallet and a 3″ – 4″ chisel to split blocks along the center groove. This gives each unit the natural split face appearance. If your design has a corner, start by using a corner unit. Place each unit directly on the compacted gravel base to begin the wall installation, leveling each one with a carpenter’s level. Take your time and do this properly.

Laying Additional Rows

Sweep debris off the top of the first row and place your first block, starting at a corner if you have one, offsetting it by half a block. This will ensure your joints will be staggered, which is necessary for proper stability of the wall. Cut a block in half to complete the beginning of the row. Continue in this fashion until you reach your previously determined height, backfilling every two rows.

Backfilling

Gravel is used behind the wall as backfill to allow for drainage. Be sure to backfill every two rows as you progress in height. A filter fabric material is used to separate the native soil from the gravel to ensure the gravel won’t become clogged and prevent proper drainage. Make sure you allow enough fabric to cover the final height of the wall. To ensure proper drainage behind the wall you should install a drainage pipe.

Coping

Coping units are used to finish off the top of the wall. They are glued in place with masonry adhesive. If your wall is curved you may have to cut the coping units to fit.

Steps

Step creation is similar to installing a retaining wall. The difference is, with steps you must compact the gravel behind each row (or riser). Place the first row of wall units directly on to the compacted base. Line up the area behind the row with the filter fabric, then fill with gravel and compact to the top of the blocks. Fit and glue the coping units (or treads). Place the next row of blocks directly behind the coping for your second tread and repeat these procedures for any additional steps required. One attractive option is to create a longer tread by installing pavers between the risers.

Raised Patio

To build a raised patio, follow the same procedure as for retaining walls. Backfill with gravel to within three inches of the top of the final height of the patio. This allows for a bed of screeded sand and the height of a paver.

Planters

The difference between constructing a planter and a raised patio is that you backfill and compact the gravel to within 6 inches of the top of the coping. Place a filter fabric over the gravel, then fill with topsoil for planting.

Posted on

Paver Installation

Paver Installation

Paver installation begins long before you put them on the ground.  Planning and design starts with a clear idea of what you want to accomplish. A detailed, measurement inclusive sketch of the overall area is necessary to determine product quantities and project budget. This can range from a simple, drawn sketch or one completed by a landscape professional. Bring us your sketch and our installation experts can determine the quantity of materials required for your project.  Then, you can move forward with the multiple steps involved in paver installation.

Base Preparation

Begin by marking out the area to be excavated. Excavating removes loose topsoil or fill and allows for the placement of a compacted gravel base. Small areas are easy to excavate by hand, but for larger areas you may wish to hire an excavating contractor. Before you excavate you will need to call local utility companies (e.g. phone, gas, and electric) to ensure that the area in which you plan to dig is free of underground cables or pipes. Technicians will come and mark these areas, usually at no charge. Always excavate the area to be paved slightly wider to give you some breathing room. Fill the area with the correct amount of gravel (see “Base Thickness Chart” below), then grade your base material as closely as possible to the final contour of the patio surface. Remember to slope all installations away from the house for drainage purposes. An attractive alternative to excavating for a patio is creating a raised patio using retaining walls.

Compacting the Gravel Base

The base preparation is the most important part of the entire installation process. Appropriate base material, thickness, and compaction are essential to ensure your installation will last a lifetime. Use either a hand tamper or plate compactor and firmly compact the gravel base material. For best compaction, compact 4″ layers.

Screeding

Pavers are laid on a bed of coarse sand. This bed should be 1″ to 1-1/2″ thick, no more, and is placed directly on top of the compacted base material. Using screed guides (1″ to 1-1/2″ in diameter) placed on the base, level the sand evenly by pulling a straight board along the guides. You can check the final level of the pavers by placing a paver on a guide. Once you’ve completed an area, remove the guides, filling the grooves, and continue screeding.

Laying

Begin placing the pavers directly on the screeded bed of sand, leaving a small space of approximately 1/8″ between each paver. Start laying along the longest straight side of the area to keep lines straight. This will minimize the amount of cutting required. It is important that the lines of your pavers are square, 90 degrees to each other, to fit properly. If you are installing circles, fans, or a soldier course (a border of pavers around the perimeter of an area) you will want to place these first before installing the rest of the pattern.

Cutting

You may need to cut pavers that don’t fit along edges or around objects. Mark the pavers and cut with either a guillotine cutter or masonry saw. A guillotine cutter is the easiest cutting method, but for an exact cut a masonry saw works best.

Edge Restraints

Edge restraints are a critical element to the durability of a paver installation, as they prevent the pavers from moving and shifting over time. There are several options for restraint, including plastic edge restraint that is economical and effective. Various concrete edging materials also work well with color and texture.

Compacting the Pavers

After the installation is complete, including edge restraints, the pavers must be swept clean and then compacted with a plate compactor. This helps settle the pavers into the bedding sand and creates a smooth, flat surface.

Jointing Sand

Sweeping specially graded jointing sand into the joints of the pavers further locks the pavers together.